Condition launch point
Condition launch point
Maximo conditions are based on the javacc parser used in Workflows, Conditional UIs and others. One aspect of custom conditions lets you write a condition using Java code, in case the condition is complicated enough to be encoded using the javacc based condition grammar. This launch point lets you avoid Java coding and enables you to attach a scripted condition to Workflows and Conditional UIs.
For example, the use case is to add a condition to the workflow that would change the status of Asset from “not ready” to “operating” if the Asset has spareparts quantity total as greater than 10 and the asset vendor is not null.
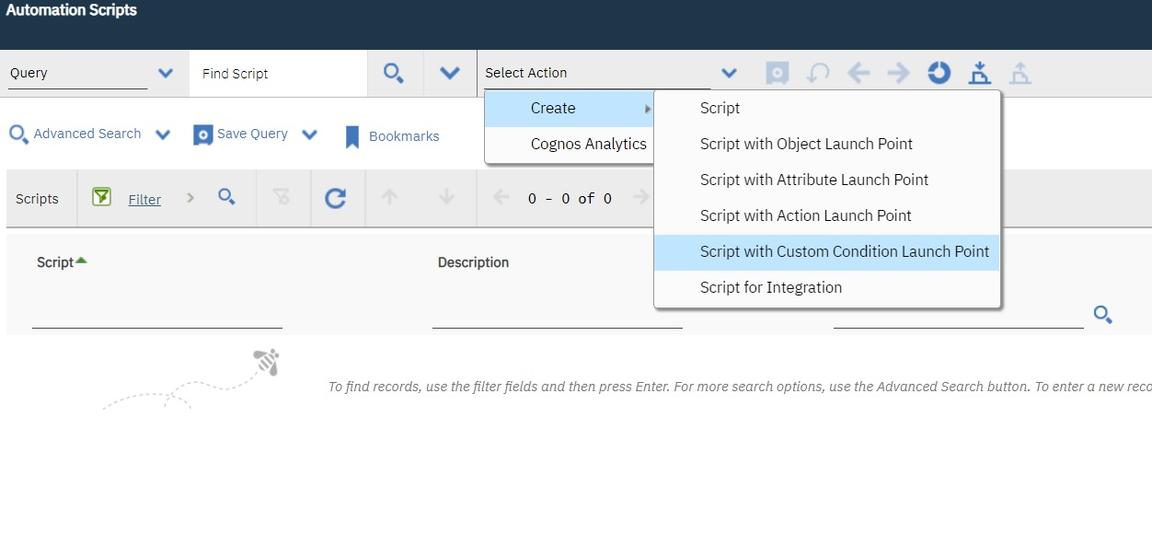
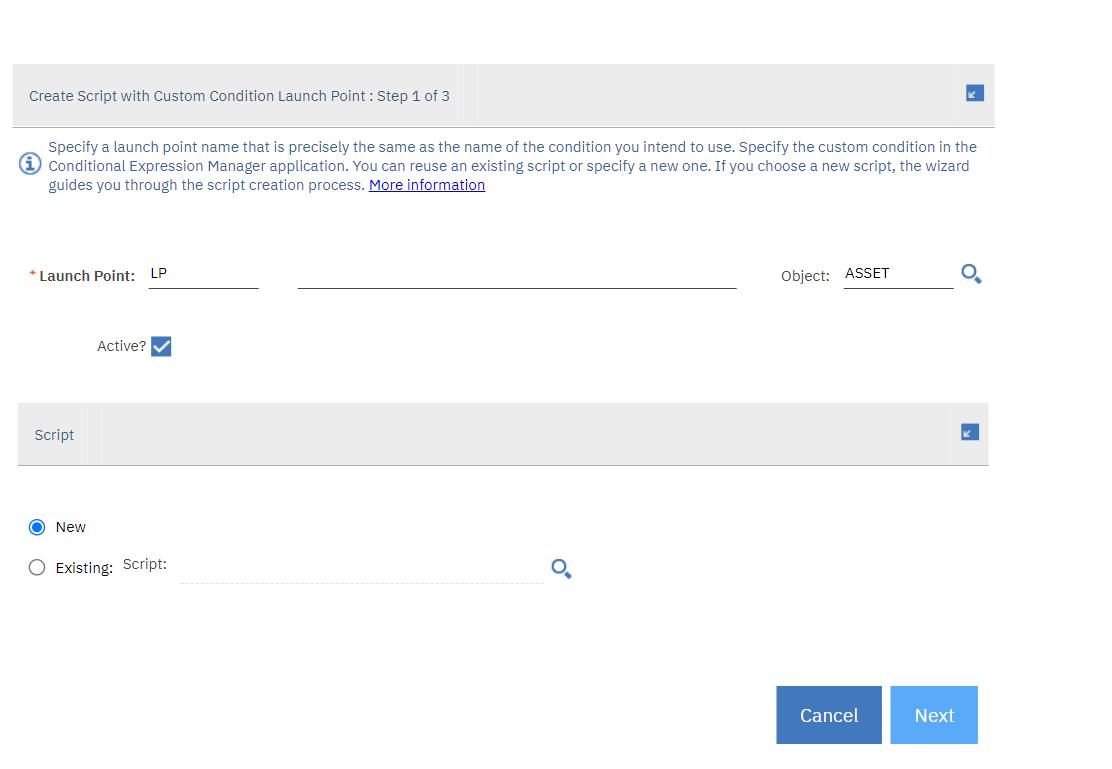
Launch the wizard for the condition launch point from the Automation Scripts application:
List Tab → Drop down actions → Create → Create Script with Custom Condition Launch Point

- Define the launch point using a new script.

- Define and bind the variables. This script will use the following two variables.
| Variable name | Variable type | Binding |
|---|---|---|
| vend | IN | vendor |
| qtys | IN | sparepart.quantity* |
- Define the script. The following script is what you should use:
if vend is not None and qtys is not None and sum(qtys)>10:evalresult=true
This evalresult is an implicit variable, which carries the boolean result of the condition evaluation. It is predefined and is always there for condition launch points.
At the end of the wizard process when you submit the design, it will create a script with the logic you defined. You also have to attach the script to the actual condition which is still a manual process. Follow the steps:
- Create a condition node in the workflow designer.
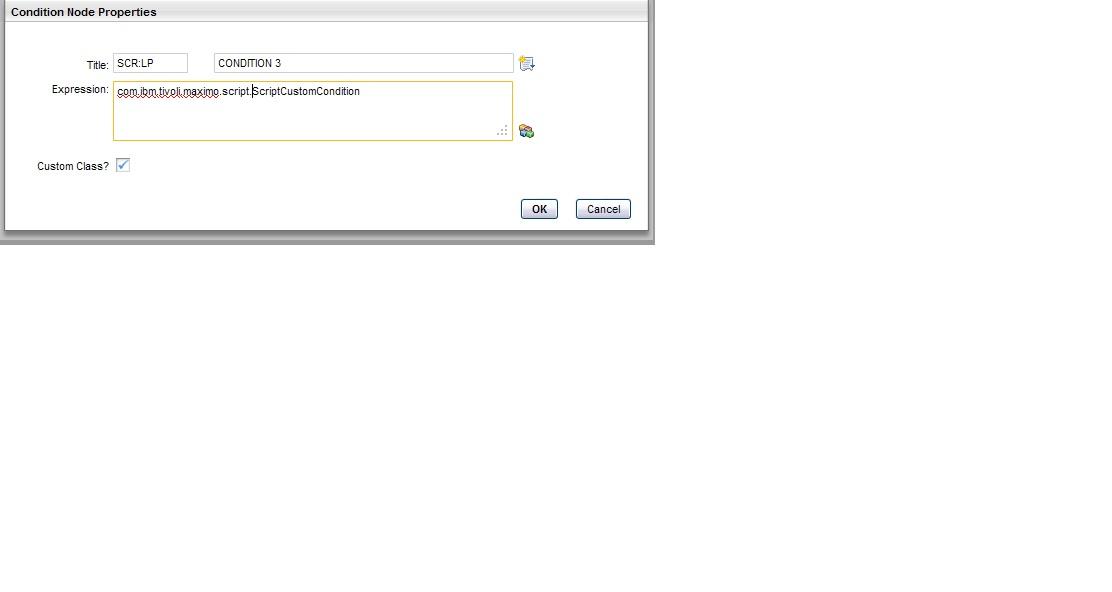
- Set the title of the condition node to
scriptname:launchpointnamewhere script name and the launch point name would point to the script+launch point pair just created. - Go to the Condition Node Properties dialog to set the condition type as custom and set the custom Java class to com.ibm.tivoli.maximo.script.ScriptCustomCondition, which is the predefined proxy for the scripted conditions.
- Save and activate the workflow.

The title field value is mapped to the WFNODE MBO’s title attribute, which has a limit of 10 characters. The title is holding a pointer to the script launch point pair by appending the script name and the launch point name with the “:” as separator. Both the script name and launch point name can be 20 characters which is a default setting. There is a length issue here and at this point there is not much you can do but use a maximum of four characters for the script and launch point name. Also, if the script has a single launch point, you can omit the launch point name from the title and use only the script name. The reason to do it this way as opposed to keeping an entry in the WFNODE table for the script name and the launch point name is to not modify any existing Maximo artifacts.
The condition in the example was trivial and meant to demonstrate the “how to do custom conditions using scripting” aspect. You can harness all the powers of scripting in this launch point and do all complicated evaluations needed to get the boolean result or evalresult for the evaluation.